IoT - Using Cloud IoT Core to connect a microcontroller (ESP32) to the Google Cloud Platform
In the previous post, we used an ESP8266 to collect and send temperature + humidity data to a locally hosted Raspberry Pi.
Now, let’s imagine we have thousands of sensors, collecting various data all around us.
A solution that scale would be to have these microcontrollers sending data securely to the Cloud.
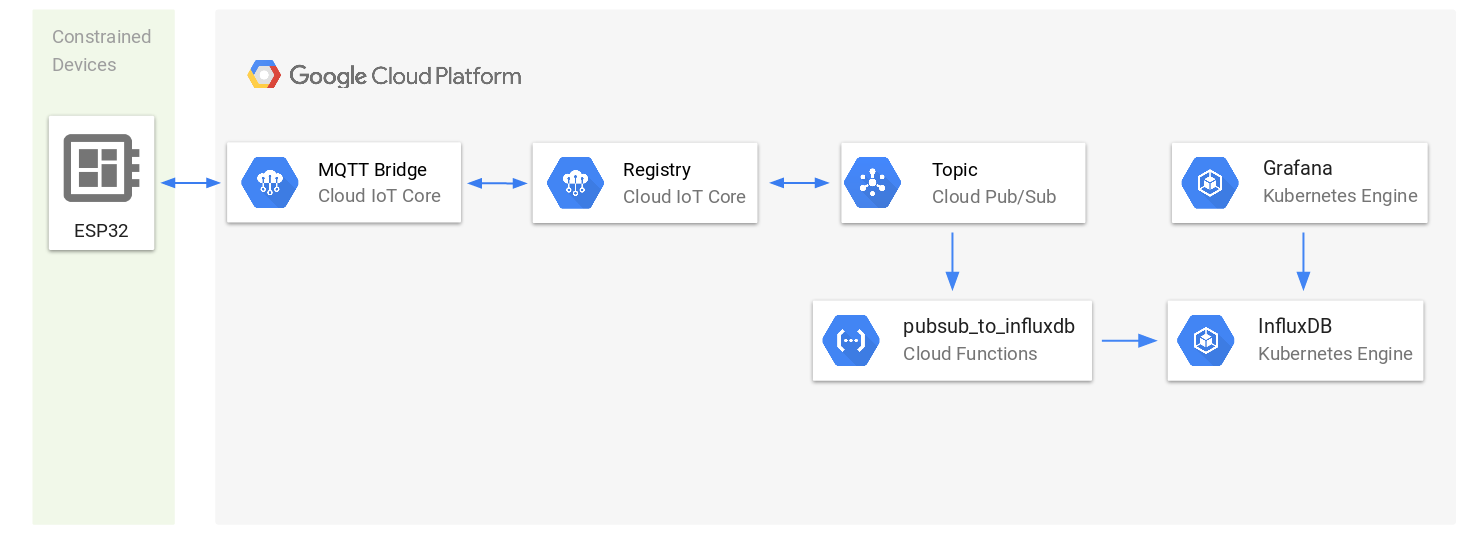
This is what we will achieve today, connecting an ESP32 to Cloud IoT Core, and using Google Kubernetes Engine to host InfluxDB and Grafana instances, so we can access sensor data from anywhere.
A video example of what will be achieved can be seen here:
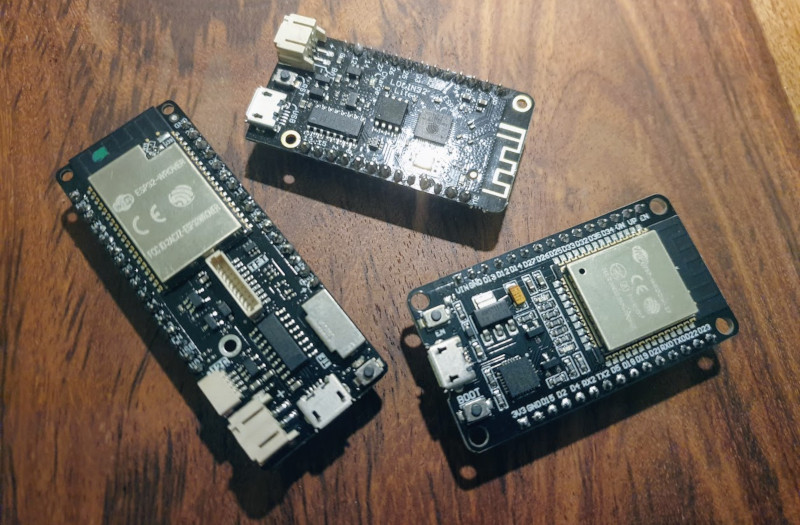
ESP32
We will use an ESP32, which is a $5 microcontroller with Wi-Fi & dual-mode Bluetooth capabilities.
It is a successor to the ESP8266, with a faster CPU (dual-core @ 160 or 240 MHz), more ram (520 KiB SRAM), Bluetooth 4.2+BLE support, and cryptographic hardware acceleration (AES, SHA-2, RSA, ECC, RNG), which is very interesting for us, as we want data to be encrypted before being sent to the Cloud.
The ESP32 will communicate with a BME280 temperature & humidity sensor.
To prototype quickly, we will use the Arduino IDE to write code for the ESP32.
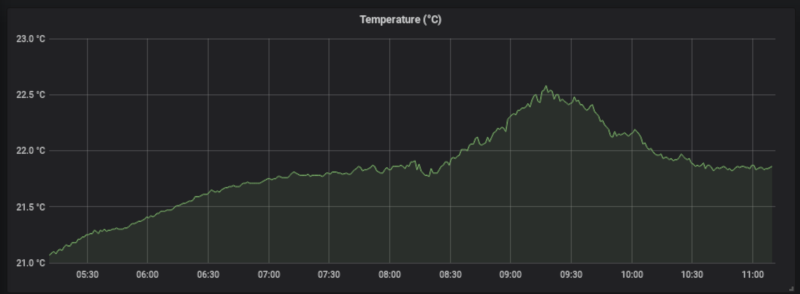
We will print temperature data to the Serial, and use the Serial Plotter feature from the Arduino IDE (available in the Tools menu) to have a visual representation of the data:
void loop() {
  Serial.println(bme.readTemperature());
  delay(10);
}

Complete implementation available on this link
Google Cloud IoT Core
Connecting a single device to a remote service is quite an easy thing.
However, when you start having thousands of devices, you need a secure and cost-saving solution that helps you manage all your devices easily and dealing with all the received data.
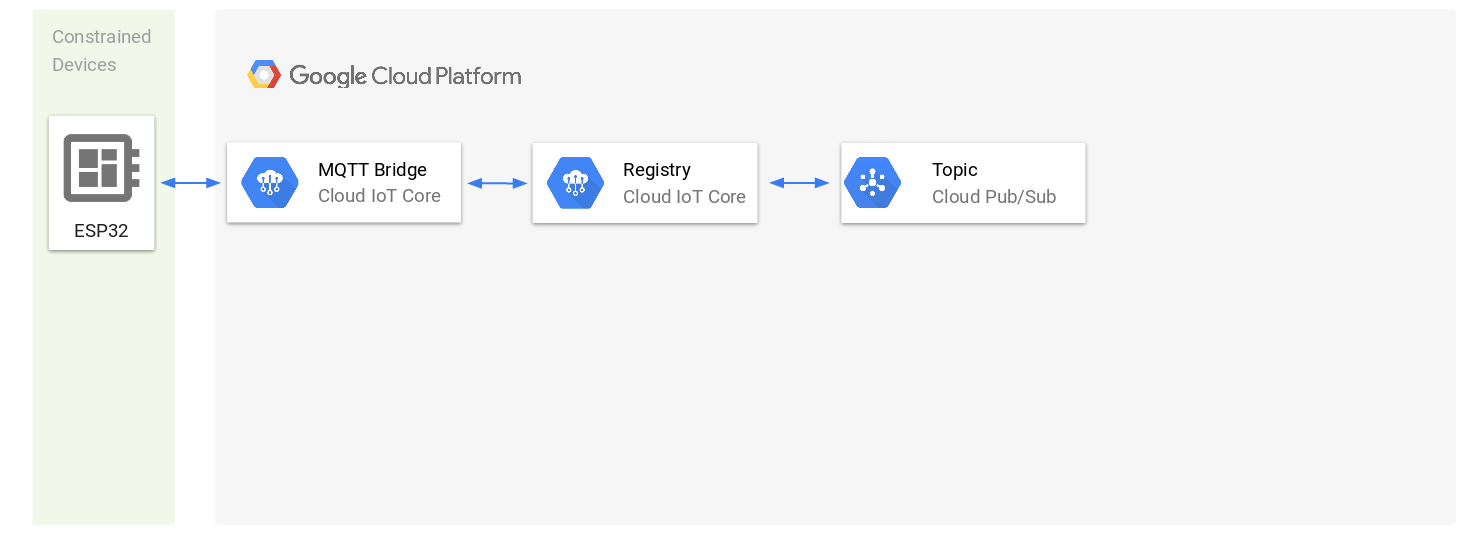
Cloud IoT Core is a fully managed service that allows you to easily and securely connect large fleets of devices directly to the Google Cloud. By connecting microcontrollers to the cloud, you potentially transform these limited devices into hugely smart products.
We have to think of Cloud IoT Core as an entry point to the Google Cloud Platform for IoT devices.
It is composed of two main components, a device manager and a protocol bridge:
- The device manager helps establishing the identity of a device and provides the mechanism for authenticating a device when connecting. It also maintains a logical configuration of each device and can be used to remotely control any device from the cloud.
- The protocol bridge is the way for your device to access the Google Cloud through standard protocols such as MQTT and HTTP, so you can use your existing devices with minimal firmware changes.
The protocol bridge publishes all device telemetry to Cloud Pub/Sub
Once the data is in Pub/Sub, it is in the Google Cloud, and you can consume it the way you want. We will use a Google Cloud Function to transmit that data from Pub/Sub to a time-series database (InfluxDB) located in a GKE cluster.
But first, we need to connect our microcontroller to Cloud IoT Core.
Connecting an ESP32 to Cloud IoT Core
Before using Cloud IoT core, we first have to create a Google Cloud project, and enable Cloud IoT Core and Pub/Sub APIs. This can be done either from the web console, or using the gcloud command-line tool, which we will be using (If you have any issue, refer to the quick start guide)
export PROJECT_ID="<your-project-id>"

# Authorize gcloud to access the Cloud Platform with Google user credentials
gcloud auth login

# Create a new project
gcloud projects create $PROJECT_ID

# Set default project
gcloud config set project $PROJECT_ID

# Enable Cloud Pub/Sub
gcloud services enable pubsub.googleapis.com

# Open this URL to enable billing (required for Cloud IoT)
open "https://console.cloud.google.com/iot/api?project=$PROJECT_ID"

# Enable Cloud IoT
gcloud services enable cloudiot.googleapis.com

# Give permission to Cloud IoT Core to publish messages on Cloud Pub/Sub
gcloud projects add-iam-policy-binding $PROJECT_ID \
  --member=serviceAccount:cloud-iot@system.gserviceaccount.com \
  --role=roles/pubsub.publisher
Messages received from Cloud IoT Core will be automatically forwarded to a Pub/Sub topic.
As you have guessed, we should create a Pub/Sub topic, and a subscription:
export PUBSUB_TOPIC="iotcore-topic"
export PUBSUB_SUBSCRIPTION="iotcore-subscription"

gcloud pubsub topics create $PUBSUB_TOPIC
gcloud pubsub subscriptions create $PUBSUB_SUBSCRIPTION --topic $PUBSUB_TOPIC
It is now time to create a device registry. A registry is like a bucket for your IoT devices.
It allows you to group devices and set properties that they all share, such as connection protocol, data storage location, and Cloud Pub/Sub topics
export REGISTRY_NAME="iotcore-registry"
# Choose your region: https://cloud.google.com/compute/docs/regions-zones/
# Valid cloud regions are [asia-east1, europe-west1, us-central1]
export REGION_NAME="<region-name>"

# Create Cloud IoT registry specifying Cloud Pub/Sub topic name
gcloud iot registries create $REGISTRY_NAME \
  --region=$REGION_NAME \
  --event-notification-config=topic=$PUBSUB_TOPIC \
  --enable-mqtt-config --enable-http-config
We have enabled both the MQTT and the HTTP bridge.
The HTTP bridge is only enabled here for the example. We actually don’t need it for this project.
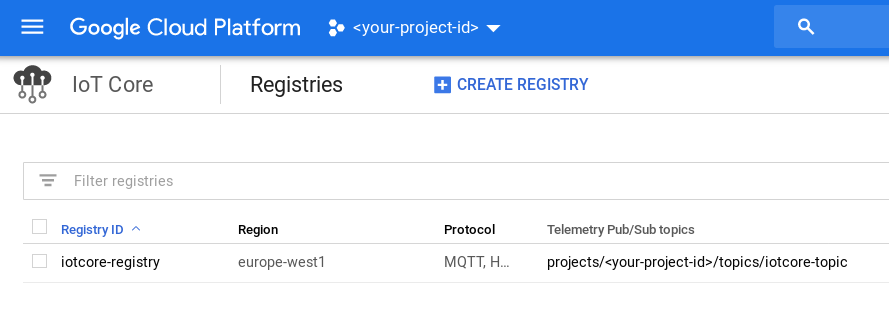
The registry has been created and is visible in the web console (https://console.cloud.google.com/iot/registries):
Now that we have a device registry, we can register a device (our ESP32) in that registry:
Devices will authenticate to the bridge using a Json Web Token (JWT).
Cloud IoT Core uses public key authentication, and supports the RSA and Elliptic Curve algorithms.
We will generate key pairs, and create a new device using the newly generated public key:
export DEVICE_NAME="esp32"

# Generate an Eliptic Curve (EC) ES256 private / public key pair
openssl ecparam -genkey -name prime256v1 -noout -out ec_private.pem
openssl ec -in ec_private.pem -pubout -out ec_public.pem

# Create a new Cloud IoT device
gcloud iot devices create $DEVICE_NAME \
  --region=$REGION_NAME \
  --registry=$REGISTRY_NAME \
  --public-key="path=./ec_public.pem,type=es256"
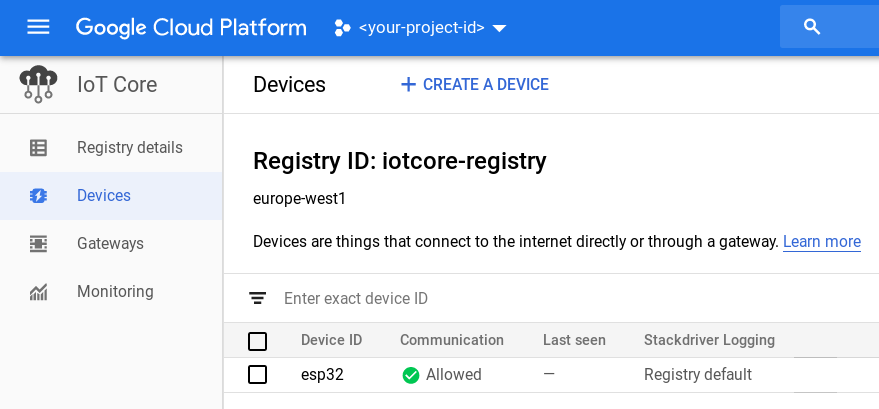
Our device is created and visible in the web console:
Connecting to the HTTP / MQTT bridges
One of the advantages of Cloud IoT Core is that you can connect constraint devices such as MCUs using MQTT or HTTP.
This is very convenient, as size is limited on microcontrollers and often, you can’t afford to include or create a proprietary heavy library or SDK to your project.
Since MQTT and HTTP are industry standard protocols, there are great chances that those are already supported by your devices.
In this section, we will try both bridges from our computer, using curl (for the HTTP bridge) and mosquitto (for the MQTT bridge).
HTTP Bridge
To send telemetry events to the Cloud using the HTTP bridge, you have to send a POST request containing base64 encoded data to a given URL.
The request must contain an authorization header with a valid JWT generated using your device’s private key (this script can help generate one).
# Generate the JWT
$ ./main.py
b'<your-jwt-token>'

# Encode data in base64
$ echo "hello" | base64
aGVsbG8K

# Send the POST request
$ curl -X POST \
  -H 'authorization: Bearer <your-jwt-token>' \
  -H 'content-type: application/json' \
  -H 'cache-control: no-cache' \
  --data '{"binary_data": "aGVsbG8K"}' \
  'https://cloudiotdevice.googleapis.com/v1/projects/<your-project-id>/locations/<region-name>/registries/iotcore-registry/devices/<device-name>:publishEvent'
{}
To verify that it works, you can pull the Pub/Sub subscription:
$ gcloud pubsub subscriptions pull --auto-ack $PUBSUB_SUBSCRIPTION --limit=1
┌───────┬─────────────────┬─────────────────────────────────────┐
│  DATA │    MESSAGE_ID   │              ATTRIBUTES             │
├───────┼─────────────────┼─────────────────────────────────────┤
│ hello │ 410723114212418 │ deviceId=esp32                      │
│       │                 │ deviceNumId=1241241241241241        │
│       │                 │ deviceRegistryId=iotcore-registry   │
│       │                 │ deviceRegistryLocation=europe-west1 │
│       │                 │ projectId=<your-project-id>         │
│       │                 │ subFolder=                          │
└───────┴─────────────────┴─────────────────────────────────────┘
It may take a few seconds to be visible, try again to pull the pubsub subscription, if you don’t see any data.
As you have seen, this is very easy for any device to send data securely in the Google Cloud, using the HTTP bridge from Cloud IoT core.
However, it is recommended, if possible, to use the MQTT bridge instead, as the protocol is more optimized for the IoT.
MQTT Bridge
We will be using Mosquitto to test the MQTT bridge on our computer before writing some microcontroller code.
This time, the JWT has to be passed in the password field; the username won’t be checked as all the information is in the JWT, so we can set the username to any value (such as "unused" for instance).
IoT core does all the encrypted communication through TLS1.2 or higher to ensure that all of your devices are secure when they’re talking to the cloud.
Make sure to specify the CA file, by downloading roots certificates and providing those to your MQTT client:
# First, download root certificates
$ curl https://pki.goog/roots.pem > roots.pem

# Use Mosquitto to publish a message to the MQTT bridge
mosquitto_pub \
--host mqtt.googleapis.com \
--port 8883 \
--id projects/<your-project-id>/locations/<region-name>/registries/iotcore-registry/devices/<device-name> \
--username unused \
--pw "<your-jwt-token>" \
--cafile ./roots.pem \
--tls-version tlsv1.2 \
--protocol-version mqttv311 \
--debug \
--qos 1 \
--topic /devices/<device-name>/events \
--message "Hello MQTT"
Again, you can pull the MQTT subscription to verify that it works:
$ gcloud pubsub subscriptions pull --auto-ack $PUBSUB_SUBSCRIPTION --limit=1
┌────────────┬─────────────────┬─────────────────────────────────────┐
│    DATA    │    MESSAGE_ID   │              ATTRIBUTES             │
├────────────┼─────────────────┼─────────────────────────────────────┤
│ Hello MQTT │ 410700146251251 │ deviceId=esp32                      │
│            │                 │ deviceNumId=3069493838977348        │
│            │                 │ deviceRegistryId=iotcore-registry   │
│            │                 │ deviceRegistryLocation=europe-west1 │
│            │                 │ projectId=<your-project-id>         │
│            │                 │ subFolder=                          │
└────────────┴─────────────────┴─────────────────────────────────────┘
Connecting the ESP32 to Cloud IoT Core
We will be using the MQTT bridge, which means that our microcontroller code will need an MQTT client, and a way to generate a JWT from a given private key.
We could write some code for that, but hopefully some very lightweight libraries and SDKs already exist to speed up and simplify the integration between a device and Cloud IoT Core.
The recommended way to connect a device to Google Cloud IoT Core is to use the Cloud IoT Device SDK, which consists of client libraries written in Embedded C that enable developers to securely connect, provision, and manage devices with Cloud IoT Core.
You can find on this repository a sample project that demonstrates how to use the Cloud IoT Device SDK on the ESP32, using ESP-IDF (FreeRTOS), if you are interested.
In this blog post, we won’t be using the Cloud IoT SDK though, as there is an easier way to integrate Cloud IoT Core to an Arduino project, by using the google-cloud-iot-arduino and the arduino-mqtt libraries.
After importing the Arduino libraries, we will call the setupCloudIoT to setup the Wi-Fi, the device time, and to start an MQTT client.
In the main loop, we need to maintain the MQTT connection, and call publishTelemetry every minute to send temperature + humidity data to Cloud IoT Core:
unsigned long lastMillis = 0;

void setup() {
  bme.begin(BME280_ADDRESS);
  setupCloudIoT();
}

void loop() {
  mqttClient->loop();

  if (!mqttClient->connected()) {
    connect();
  }

  // publish a message roughly every minute.
  if (millis() - lastMillis > 60000) {
    lastMillis = millis();

    String payload =
      String("{\"timestamp\":") + time(nullptr) +
      String(",\"temperature\":") + bme.readTemperature() +
      String(",\"humidity\":") + bme.readHumidity() +
      String("}");
    publishTelemetry(payload);
  }
}
Complete implementation available below (choose the one you prefer):
-
Arduino implementation (using the “Google Cloud IoT Core JWT” and “Arduino MQTT” libraries):
https://github.com/Nilhcem/esp32-cloud-iot-core-k8s/tree/master/02-esp32_bme280_ciotc_arduino -
ESP-IDF (FreeRTOS) implementation (using the “Cloud IoT Device SDK”):
https://github.com/Nilhcem/esp32-cloud-iot-core-k8s/tree/master/03-esp32_bme280_ciotc_esp-idf
Deploy InfluxDB and Grafana to GKE
Data will be persisted to an InfluxDB instance, so it can be viewed using Grafana (as we saw in the earlier video). Both instances are stored in Google Cloud.
To easily deploy InfluxDB and Grafana instances to the Google Cloud, you could use Google Cloud Platform Marketplace (Google Click to Deploy)
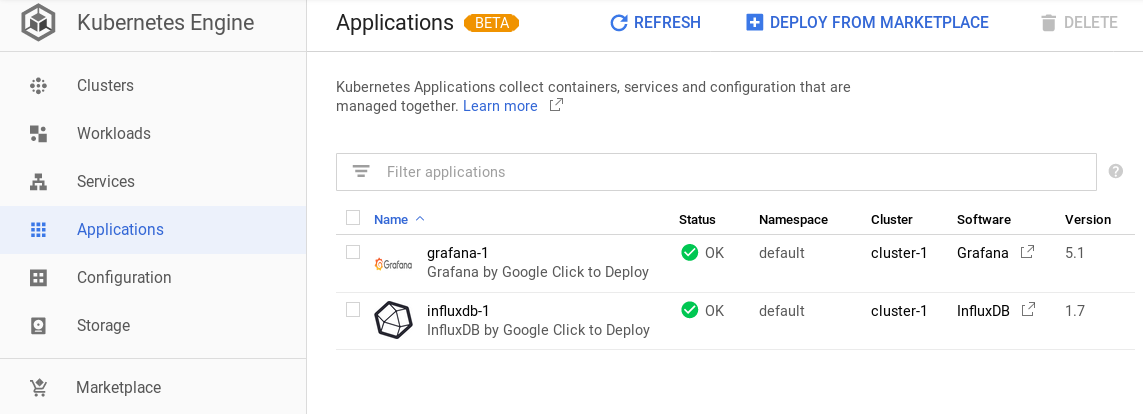
I personally don’t really like this approach, and prefer to create my own Kubernetes yaml files, which gives me more flexibility and also gives me the possibility to test it anytime on my local computer using tools such as Minikube or Docker for Desktop.
Kubernetes scripts and howto are available here:
https://github.com/Nilhcem/esp32-cloud-iot-core-k8s/tree/master/05-influxdb_grafana_k8s
We can clone the project, then create the Kubernetes objects:
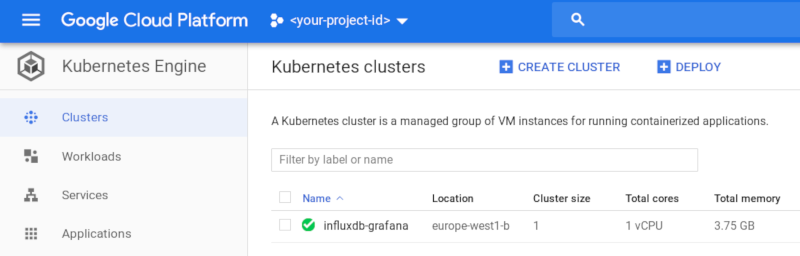
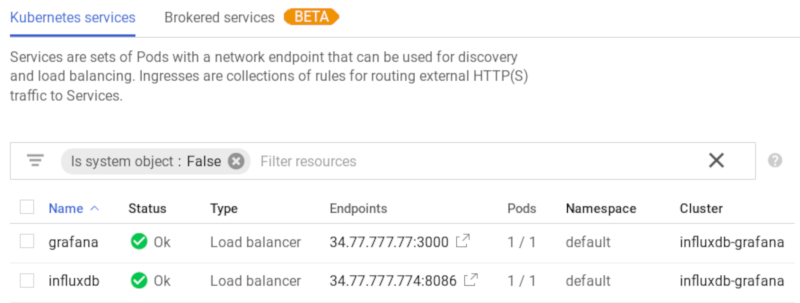
kubectl create -f k8s/
And now, we have our cluster running and available from anywhere:
Persist received data with a Cloud Function
The last step is to persist data from Pub/Sub to InfluxDB.
For that, we can write a Cloud Function that will be triggered each time a message is available on Pub/Sub.
We can write Cloud Functions in Javascript, Python, and Go. I opted for a Python Cloud Function:
import base64
import json
from datetime import datetime

from influxdb import InfluxDBClient


def iotcore_pubsub_to_influxdb(data, context):
    influxdb_client = InfluxDBClient('<host>', 8086, '<username>', '<password>', 'iot')
    device_id = data['attributes']['deviceId']
    json_data = base64.b64decode(data['data']).decode('utf-8')
    iot_data = json.loads(json_data)
    time_str = datetime.utcfromtimestamp(iot_data['timestamp']).strftime('%Y-%m-%dT%H:%M:%SZ')

    for measurement in ['temperature', 'humidity']:
        if measurement in iot_data:
            _send_sensor_data_to_influxdb(influxdb_client, device_id, time_str, measurement, iot_data[measurement])


def _send_sensor_data_to_influxdb(client, device_id, time_str, measurement, value):
    json_body = [
        {
            'measurement': measurement,
            'tags': {
                'device': device_id
            },
            'time': time_str,
            'fields': {
                'value': float(value)
            }
        }
    ]
    client.write_points(json_body)
Deploying the Cloud function can be done in as simple command:
gcloud functions deploy iotcore_pubsub_to_influxdb \
  --runtime python37 \
  --trigger-topic $PUBSUB_TOPIC \
  --region $REGION
Complete implementation available here:
https://github.com/Nilhcem/esp32-cloud-iot-core-k8s/tree/master/06-cloud_function
And we have everything running!
In this article, we discovered how Cloud IoT Core helps us to easily and securely connect large fleets of devices directly to the Google Cloud, using industry standard protocols such as HTTP or MQTT.
Our ESP32 is now connected to the Google Cloud and is sending data there continuously.
You can find the complete source code here: https://github.com/Nilhcem/esp32-cloud-iot-core-k8s
Next time, will see other ways to collect, process, analyze and visualize IoT data, skipping kubernetes, using only hosted Google services.