Android - Add some machine learning to your apps, with TensorFlow
TensorFlow is an open source software library for machine learning, developed by Google and currently used in many of their projects.
An easy, fast, and fun way to get started with TensorFlow is to build an image classifier: an offline and simplified alternative to Google’s Cloud Vision API where our Android device can detect and recognize objects from an image (or directly from the camera input).
In this article, we will create an Android app that can recognize video-game characters.
First, run the Android classifier sample
An official TensorFlow Android image classifier sample is available on the main GitHub repository.
However, if you want to build it, it will take you some time, as you’ll need to install the NDK, Bazel, and the total build time with Android Studio will take around 40 minutes.
That’s not really compatible with my initial “easy, fast, and fun” description, so instead I’ve created a gradle standalone prebuilt fork of the TensorFlow 1.4.0 Android sample at github.com/Nilhcem/tensorflow-classifier-android you can directly clone, import on Android Studio and run within 2 minutes:
git clone https://github.com/Nilhcem/tensorflow-classifier-android.git
cd tensorflow-classifier-android
git checkout 1.4.0
OPTIONAL (begin)
If you want to port the TensorFlow official Android Sample to a prebuilt Android Studio project by yourself, you will need to:
- Import the original TensorFlow Android sample sources (commit)
- Create a new Android Studio project (applicationId:
org.tensorflow.demo), to have an already set up gradle configuration (commit) - Move TensorFlow’s Android sample files into the new gradle project (commit)
- Remove the DetectorActivity and StylizeActivity (we will only need the ClassifierActivity today) (commit)
- Add the tensorflow-android gradle dependency to your build.gradle file:
compile 'org.tensorflow:tensorflow-android:1.4.0' - Download the pre-trained ImageNet model (inception5h) to your assets folder (commit)
- Optionaly, add a
tensorflow_demonative library that contains methods for RGB -> YUV conversion (commit). This step is optional as the sample app provides a Java fallback if native methods fromlibtensorflow_demo.socould not be loaded.
OPTIONAL (end)
Once you have imported the TensorFlow Android sample, run it with Android Studio and start detecting things
Then, create your own image classifier
Right now, the TensorFlow sample uses “Inception”, a model pre-trained to detect 1000 objects from ImageNet 2012 Challenge image dataset.
We are going to transfer learning, which means we are starting with a model that has been already trained on another problem. We will then be retraining it on a similar problem. Deep learning from scratch can take days, but transfer learning can be done in short order.
And for that, we’ll need some data….
1. Gather lots of images
Inception works well with a various set of images (at least 30 images, more is better).
We will create a ~/tf_files/games folder and place each set of jpeg images in subdirectories (such as ~/tf_files/games/mario, ~/tf_files/games/bomberman etc)
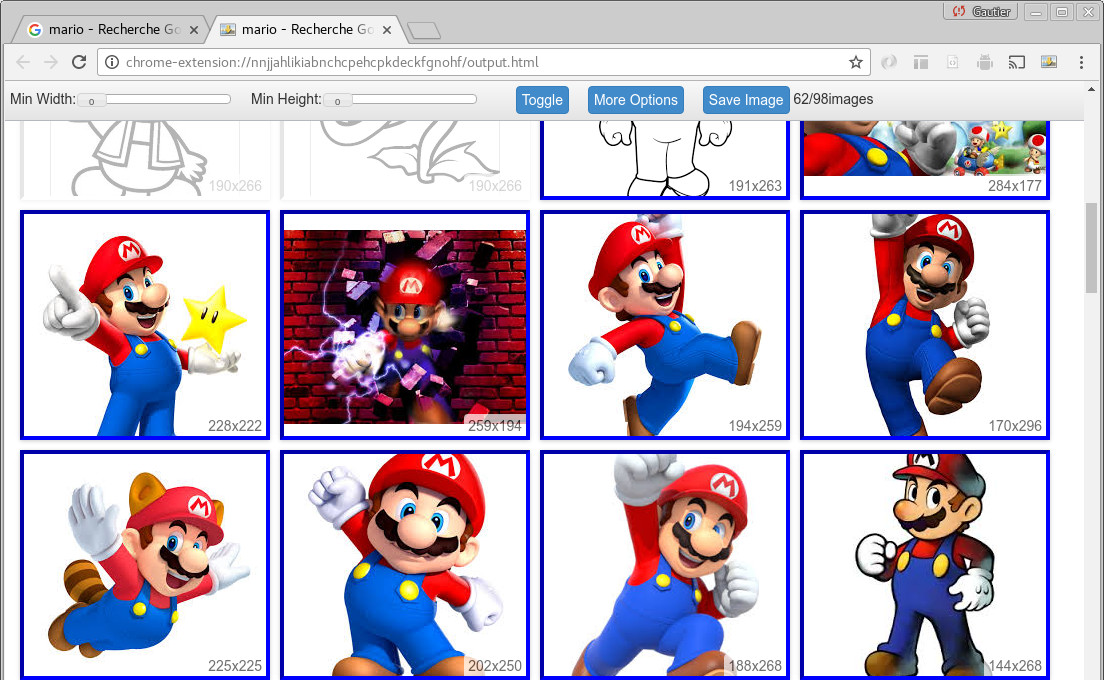
A quick way to download multiple images at once is to search something on Google Images, and use a Chrome extension for batch download.
2. Retrain the model to learn from your images
Now that we have all our images, we will retrain the model.
We can use a docker container to have an already set up TensorFlow environment:
cd ~/
git clone https://github.com/tensorflow/tensorflow.git
cd ~/tensorflow
git checkout v1.4.0

docker run -it \
  --volume ~/tf_files:/tf_files \
  --volume ~/tensorflow:/tensorflow \
  --workdir /tensorflow tensorflow/tensorflow:1.4.0 bash

python tensorflow/examples/image_retraining/retrain.py \
  --bottleneck_dir=/tf_files/bottlenecks \
  --how_many_training_steps 4000 \
  --model_dir=/tf_files/inception \
  --output_graph=/tf_files/retrained_graph.pb \
  --output_labels=/tf_files/retrained_labels.txt \
  --image_dir /tf_files/games
This operation can take several minutes depending on how many images you have and how many training steps you specified.
These commands will make TensorFlow download the inception model and retrain it to detect images from ~/tf_files/games.
The script will generate two files: the model in a protobuf file (retrained_graph.pb) and a label list of all the objects it can recognize (retrained_labels.txt).
For more information, the best tutorial you can find on the Internet so far is Google’s TensorFlow for Poets codelab (I highly recommend you to read it)
3. Optimize the model
We have our model. However, if we try to import it in our Android sample, we will get an error:
Op BatchNormWithGlobalNormalization is not available in GraphDef version 21. It has been removed in version 9. Use tf.nn.batch_normalization().
The reason is actually simple: to be kept small, the mobile TensorFlow library only contains a subset of operations.
Some operations, such as BatchNormWithGlobalNormalization, are only used during the training (on your desktop / cloud computer), and therefore are not needed on mobile.
To use our retrained model on a mobile device, we need to optimize it first, using a tool named optimize_for_inference, that removes all nodes that aren’t needed, among other optimizations.
python tensorflow/python/tools/optimize_for_inference.py \
  --input=/tf_files/retrained_graph.pb \
  --output=/tf_files/optimized_graph.pb \
  --input_names="Mul" \
  --output_names="final_result"
This script will generate after a few minutes a ~/tf_files/optimized_graph.pb file you will now be able into include in your Android project.
OPTIONAL (begin)
While we could use the model on mobile already, let’s make another optimization to drastically reduce the model size once compressed (in my case, the Android APK size will decrease from 96MB to 46MB after this optimization)
python tensorflow/tools/quantization/quantize_graph.py \
  --input=/tf_files/optimized_graph.pb \
  --output=/tf_files/rounded_graph.pb \
  --output_node_names=final_result \
  --mode=weights_rounded
This step will generate a file named ~/tf_files/rounded_graph.pb.
It is a good idea to test this new model, to verify that the optimization hasn’t had too negative an effect on the model’s performance.
OPTIONAL (end)
For more information about mobile optimizations, I suggest you to follow the Tensorflow for Poets 2: Optimize for Mobile codelab.
4. Import the new model in your Android application
We have our retrained model.
We can now delete the previous ImageNet model from the Android app’s assets folder and place the new model (~/tf_files/optimized_graph.pb (or ~/tf_files/rounded_graph.pb) and ~/tf_files/retrained_labels.txt) instead.
Also, we should update some constants in the ClassifierActivity.java, as specified in a comment in this same file:
private static final int INPUT_SIZE = 299;
private static final int IMAGE_MEAN = 128;
private static final float IMAGE_STD = 128f;
private static final String INPUT_NAME = "Mul";
private static final String OUTPUT_NAME = "final_result";

private static final String MODEL_FILE =
  "file:///android_asset/rounded_graph.pb"; // or optimized_graph.pb
private static final String LABEL_FILE =
  "file:///android_asset/retrained_labels.txt";
5. Test the trained AI
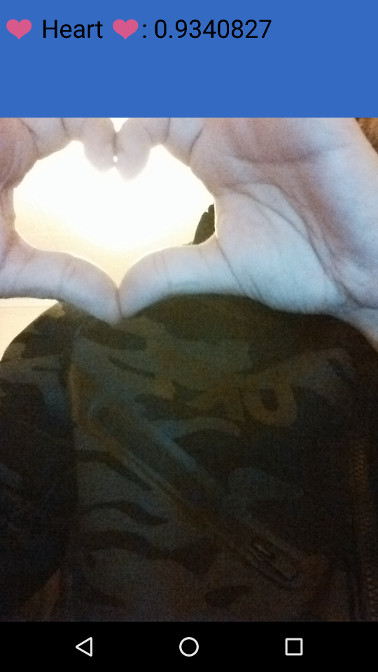
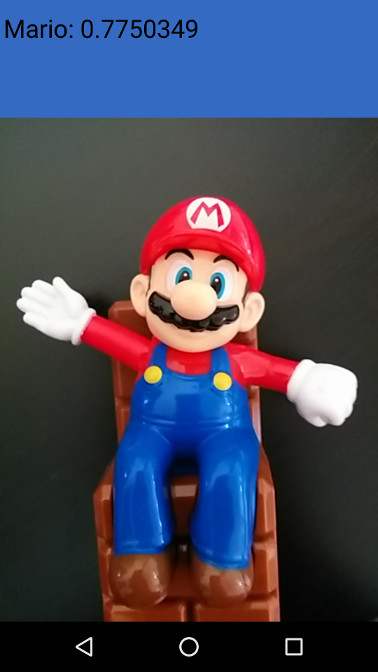
We have installed the new AI model. Now, we can deploy the project on an Android device, and have fun detecting objects using our new retrained AI:
How about Android Things?
Using TensorFlow on Android Things is a little bit easier than on Android.
There is already an official gradle sample project that works out-of-the-box with the ImageNet model, and which can be deployed quickly: github.com/androidthings/sample-tensorflow-imageclassifier/.
And if you want to use your own custom model instead, you will simply need to do exactly the same steps explained in this article (Android Things is Android, after all):
- Place your custom model (
.pband.txtfiles) in theapp/assetsdirectory - Update tensorflow-android dependency version in the
app/build.gradlefile - Modify the constants in the
Helper.javafile
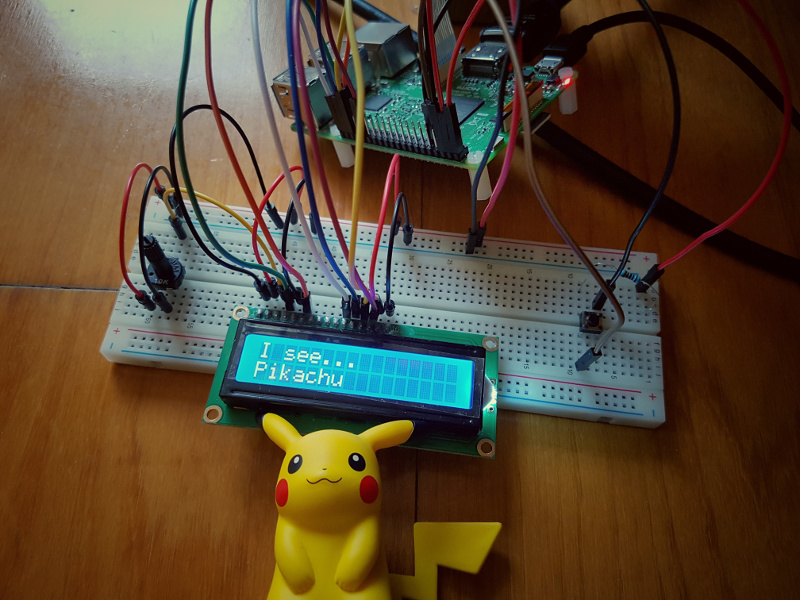
(I shamelessly stole this LCD picture idea from @riggaroo’s latest conference. Don’t tell her.)
You can watch the custom classifier in action, on this YouTube video.
The LCD driver used is the 1602 LCD module driver.
Conclusion (a.k.a. why would we need that?)
In this post, you saw something completely useless: using deep learning to classify video game characters, but you could do something funnier, like a dab detector shifumi game, for instance.
Better, you could create a robot that changes its behaviour and its way of talking according to who’s in front of it (a child / an adult).
You can use deep learning algorithm to identify skin cancer, or detect defective pieces and automatically stop a production line as soon as possible.
Why not even create a sign language recognizer?
Have fun!