Android Things - Discovering the UART API
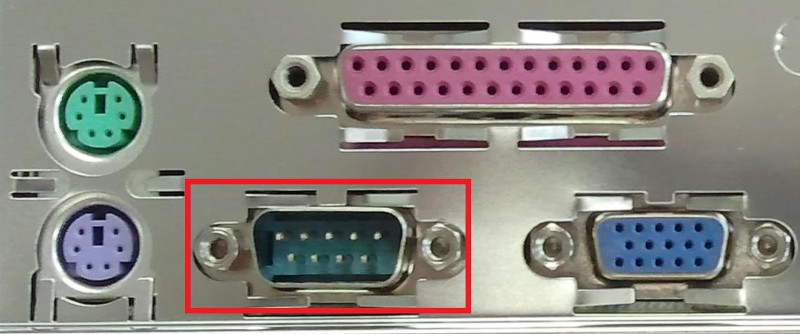
If you can easily recognize the Serial port on this picture, let me first remind you that you are old.
We’re going to talk about what’s behind this interface today. Welcome to 2017.
Discovering the UART
A UART (Universal Asynchronous Receiver/Transmiter) is a small chip integrated on the board (e.g. the Raspberry Pi) that lets you perform a bi-directional communication between two devices.
In ancient times, it was pretty useful, and seen under the form of a Serial port on a computer. Now it’s still here and rocking, this time on nano-computers.
Over this blog post, we will discover the UART across two different Android Things use cases
#1: Communication between a Raspberry Pi and a computer
I always wanted to be a rock star, but can’t play the piano. (Do rockstars play piano?)
Yet, I have years practicing on a computer keyboard; so, why not use my laptop to play Europe’s “The final countdown” song?
To achieve that, I bought a PL2303HX USB to TTL cable:
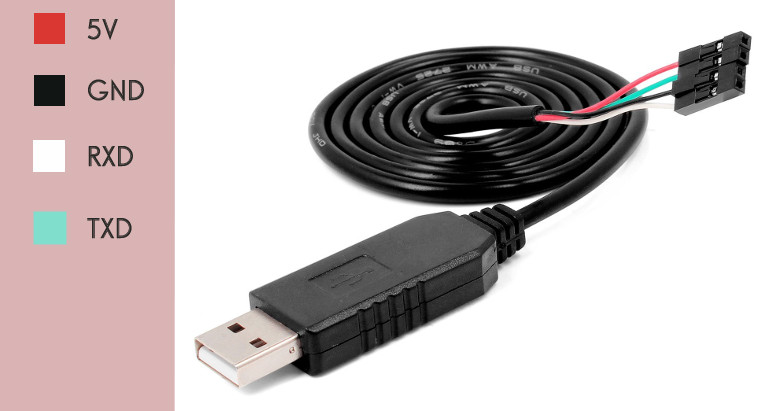
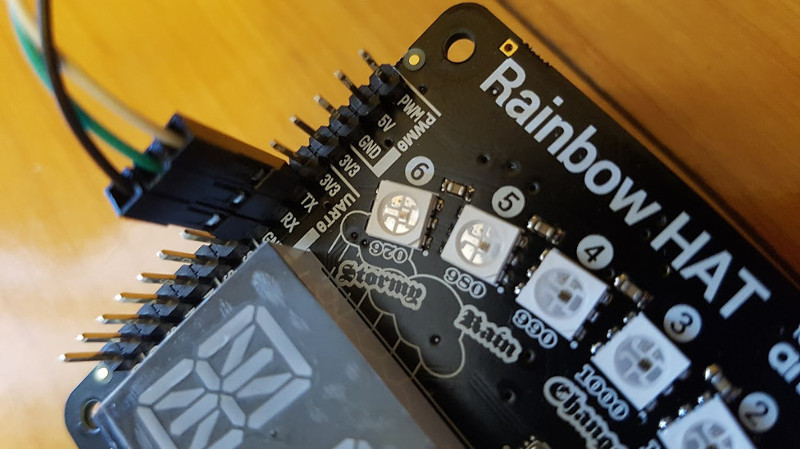
We plug the USB cable into the computer, and the pins on the Raspberry Pi.
As the ‘RT’ (Receiver/Transmitter) in UART suggests , I have to plug the Receiver (Rx) cable wire to the Raspberry Pi Transmitter (Tx) pin, and the Transmitter (Tx) cable wire to the Raspberry Pi Receiver (Rx) pin. Also, plug the Ground wire to the Ground pin (this one was easy).
Raspberry Pi configuration
By default, the Raspberry Pi UART port is mapped to the Linux console. Before accessing UART from your app, we first have to mount the Android Things micro-SD card on our computer, modify the cmdline.txt file to remove the following statement: console=serial0,115200.
Consult the official documentation for detailed instructions.
Sample UART Loopback
The best way to start playing with UART is to clone the official UART sample (sample-uartloopback) and import it on Android Studio.
The sample is easy to understand. First things first, the UART device initialization:
// We receive an instance of the "UART0" device.
UartDevice uart = PeripheralManager.getInstance().openUartDevice("UART0");

// Some basic UART configuration.
// Make sure to configure the other device the exact same way.
uart.setBaudrate(115200);
uart.setDataSize(8);
uart.setParity(UartDevice.PARITY_NONE);
uart.setStopBits(1);

// Finally, we register a callback on a background thread that will be
// triggered when some data is received via UART.
uart.registerUartDeviceCallback(mInputHandler, mCallback);
One baud is equal to 1 bit per second. A 115200 baud rate is therefore equal to 14KBps.
Pretty slow, so better transfer small payloads of data via UART.
In the last line, we are registering a callback on a background thread that will be called each time UART receives some data.
Here is an implementation of this callback:
private UartDeviceCallback mCallback = new UartDeviceCallback() {
    @Override
    public boolean onUartDeviceDataAvailable(UartDevice uart) {
        // Read the received data
        byte[] buffer = new byte[512];
        int read;
        while ((read = uart.read(buffer, buffer.length)) > 0) {
            // And send it back to the other device, as a loopback.
            uart.write(buffer, read);
        }

        // Continue listening for more interrupts.
        return true;
    }

    @Override
    public void onUartDeviceError(UartDevice uart, int error) {
        Log.w(TAG, uart + ": Error event " + error);
    }
};
Receiving and Sending data over UART is as easy as calling uart.read() and uart.write() methods.
My initial requirement was to play music when data is received. I will modify the content of the callback’s while loop to get only the first received char, and play a music note according to the given character
int key = (int) buffer[0];
char c = Character.toUpperCase((char) key);
switch (c) {
    case 'F': playNote("F#"); break;
    case 'G': playNote("G#"); break;
    case 'H': playNote("A"); break;
    case 'J': playNote("B"); break;
    case 'K': playNote("C#"); break;
    case 'L': playNote("D"); break;
}
All the magic here is simply a basic switch statement that plays a note in the piezo buzzer. No rockstar stuff here after all, just smoke and mirror.
Using a Serial Console
Now that the Android Things project is done, We’ll need a client on the computer to communicate via UART to the Android Things application.
For that, we will use a Serial Console Terminal program, such as PuTTY (Windows), Serial (Mac OS), CuteCom or Minicom (Linux), with the same configuration as the one specified in the Android Things project (Baud Rate: 115200, Data Bits: 8, Parity: None, Stop Bits: 1)
$ screen /dev/ttyUSB0 115200I connect to the USB device (on Linux) with a 115200 baud rate. Now every time I will write a character, it will be transferred to the Raspberry Pi via a Serial communication.
I can now play some music on my computer keyboard.
Source code for The Final Countdown Keyboard is available on this GitHub repository.
#2: Communication between a Raspberry Pi and an Arduino
Let’s now see a different use case.
Being a keyboard rockstar was surely fun, but if I’m using Android Things to create a smart device, I don’t want to plug it on my computer over USB all the time! Can’t we find a better usage of UART?
Imagine that you are building a smart robot. At some point, you’ll find out that the Raspberry Pi has not enough pins to make all your dreams come true (only 2 PWMs may not be enough for big needs).
How about delegating some stuff to a separate nano computer? In this use case, I’ll choose an Arduino.
Here comes the Bi-Directional Logic Level Converter
I’m using an Arduino here, instead of 2 Raspberry Pi to show you something tricky:
The Raspberry Pi pins use 3.3V, while the Arduino pins use 5V.
Connecting a Raspberry Pi pin to a voltage higher than 3.3V will likely damage your board.
To plug these 2 components together, we will use a small chip that will adapt the voltage: a Bi-Directional Logic Level Converter.
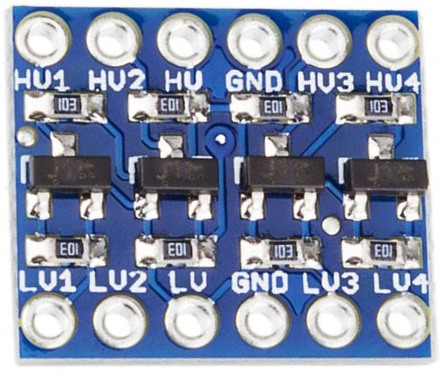
HV on the chip means “High Voltage”, and LV “Low Voltage”.
Here, a low-voltage signal sent to LV will be shifted up to the higher voltage and sent out HV
HV/LV 1 to 4 are for data (GPIO/I2C/UART). HV/LV is for the voltage pin, And once again, GND, for the ground pin.
Since the Raspberry Pi’s using 3.3V it will be plugged to the LV side. The Arduino (5V) will be on the HV side.
Blinking LEDs, once again
Making an LED blink is our new Hello, World!
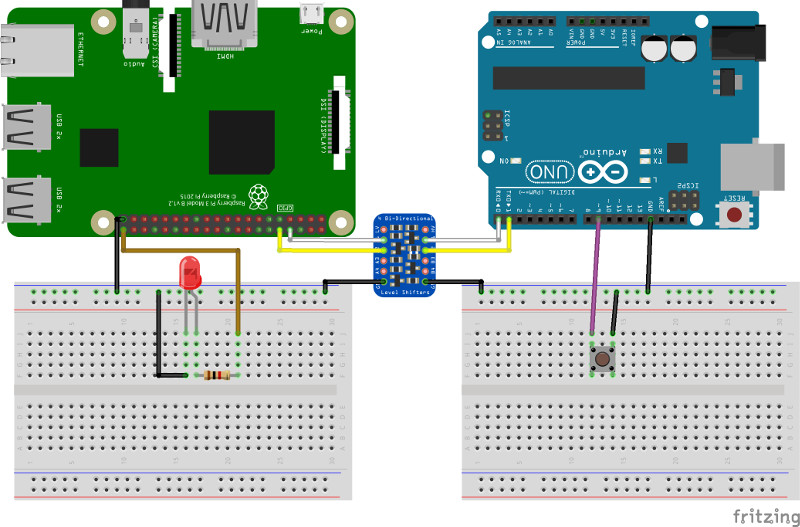
I will connect a button to the Arduino, and an LED to the Android Things Raspberry Pi.
When the button is pressed, the Arduino will delegate its work to the Raspberry Pi via UART, so that the latter can turn its LED on/off.
See below a demonstration video
Schematic
The only component linking the 2 nano-computers is the UART connection (Rx/Tx/Ground) passing through a Bi-Directional Logic Level Converter.
On the Android Things project, when receiving data, I will simply toggle the LED using the GPIO API:
private UartDeviceCallback mCallback = new UartDeviceCallback() {
    @Override
    public boolean onUartDeviceDataAvailable(UartDevice uart) {
        ledGpio.setValue(!ledGpio.getValue());
        return true;
    }
And here’s the Arduino sketch:
When pressing the button on pin #9, I send the “Pressed!” payload to the UART:
int buttonPin = 9;

void setup() {
  pinMode(buttonPin, INPUT_PULLUP);
  Serial.begin(115200);
}

void loop() {
  if (digitalRead(buttonPin) == LOW) {
    Serial.println("Pressed!");
    delay(1000);
  }
}
Conclusion
Communicating via UART on Android Things is pretty easy. It’s all about read() and write().
At this point (Android Things Developer Preview 2) where USB communication is not supported yet, it can be an alternative, as long as you send small payloads of data.
You can find many different UART use cases, from live-debugging your application over USB to your computer (e.g. create a Stetho’s dumpapp clone) to interacting with/delegating to different components/nano-computers.
As an Android Developer, it’s been years I’ve not written any code in C. Delegating stuff from an Arduino to an Android Things Java 8 / Kotlin project could be a faster way for me to prototype/achieve something complex.
Want to get started with UART right now? Clone the official sample uart loopback, and have fun!
