Android Things - Create your smart robots with API.AI and the Google Assistant
The Google Assistant brings hotword detection, voice control, natural language understanding and more to your devices.
You can already find it in many Google products, such as Android phones, wear, tv, auto, or the Google Home, but this does not stop here. Indeed, everyone can use the Google Assistant SDK to it into their own projects.
Exposed at I/O 2017, a great integration of the Google Assistant into a custom IoT device was the Mocktails Mixer, a machine with its own personality that can make cocktails drinks (source code).
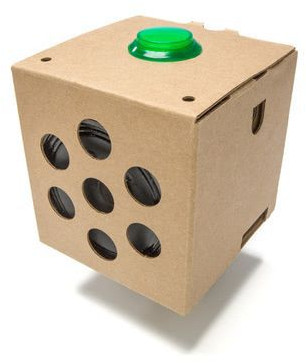
Another famous integration example is the AIY Projects Voice Kit: a cheap and easy way to build your own Google Home device.
Today, we will take inspiration from these 2 projects, and create our own cardboard robot, powered by the Google Assistant.
Total budget: $60 (or $20 if you already own a Raspberry Pi 3).
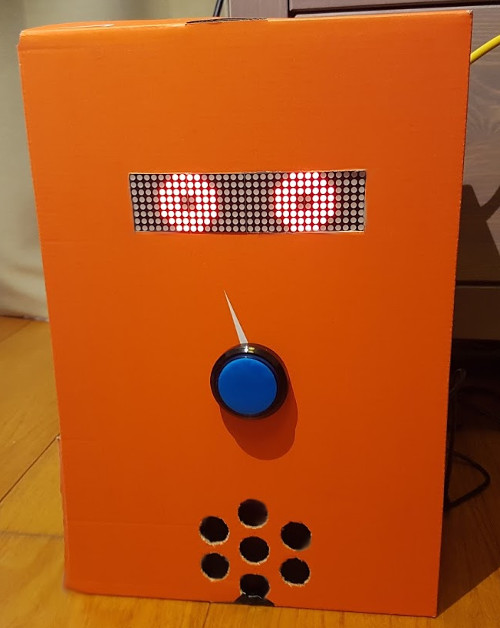
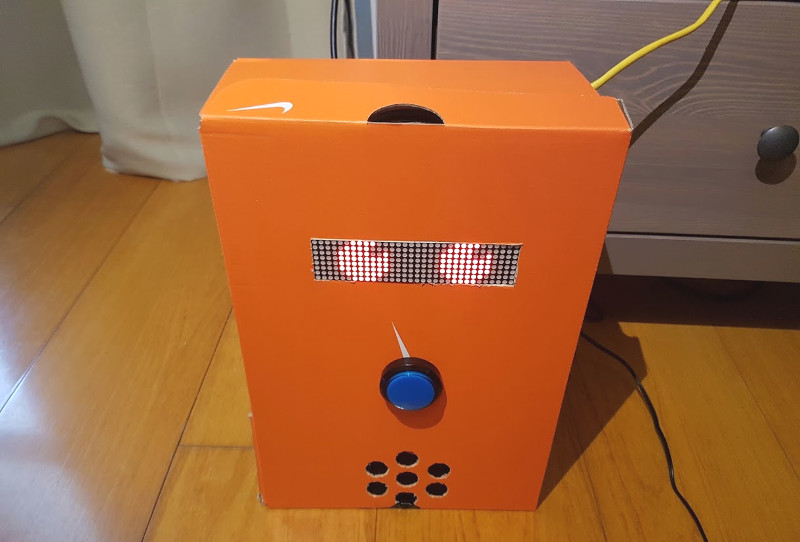
Instead of making cocktails, our robot will give us chocolate bars:
Shoebox Robot (that’s its name) has its own personality too, and likes to give us plenty of Bad Android Advice.
The TL;DR guide to building your Android Things robot, powered by the Google Assistant
- Import the official Android Things sample-googleassistant project
- Create an API.AI agent with the Actions on Google integration to create quickly and easily a conversational user experience platform.
- Extend the API.AI project, adding a webhook to your own web service (e.g. a Google Cloud Function) so you can perform custom actions when users talk to your chatbot.
- When your web service receives information from API.AI, forward those events to your Android Things device (e.g. using Pub/Sub or FCM)
- Place your Android Things project inside a shoebox (or any better container)
- Done
Step 1: Creating a Google Assistant project for Android Things
To create your own device from scratch, similar to a “Google Home”, you’ll first need a microphone, an audio speaker, one LED, and a button. Connect all those to your Android Things board, then clone the official Android Things sample-googleassistant project and follow the instructions in the README.md file.
After a few minutes, you should already have a(n ugly, but) working Google Assistant
Step 2: Create an API.AI agent
An API.AI agent corresponds to a bot, service, or device that you would like to add conversational user experience to.
We will name our agent ShoeboxRobot. This robot can essentially perform 2 main actions:
- Give something to the user (an advice, a joke, money, or chocolate)
- Inform the user about how its body parts (mouth, nose, eyes) were built.
We will start, creating some API.AI entities.
Entities are objects that you will want to interact with. Consider those sort of enums.
We will first create an entity named gift that lists all the possible stuff our robot can give:
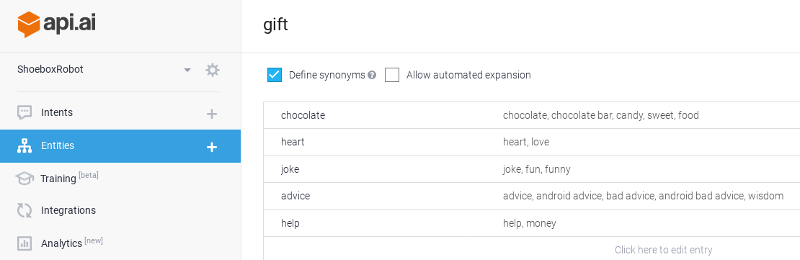
On the screenshot above, we have defined some keys and, for each key, a list of potential values and synonyms.
Here, when users say something like “Give me some {random stuff}”, API.AI will look into the gift entity to determine the meaning of the sentence.
We will create a second entity, named body-part, with the following values: mouth, ear, skin, nose, eye
Our entities are created. Now we should provide API.AI examples of possible sentences a user could say, called Intents.
An intent maps what the user says to action should be taken in your business logic.
When a user wants to know about the robot’s body parts, he may ask questions like:
- What are you made of?
- Is your mouth a speaker?
- How is made your nose?
We will create an API.AI intent, named body-parts and write possible use expressions:

You can see here that API.AI automatically highlighted words that matches to previously defined entities.
So, when the “Tell me about your eyes” sentences will be pronounced, API.AI will map to variables such as:
intentName="body-parts", parameter="eye"
Similarly, when the “What are you made of?” sentence will be pronounced, variables will be like:
intentName="body-parts", parameter=""
Let’s now create an Intent called give-stuff which is when a user wants the robot to give him something:
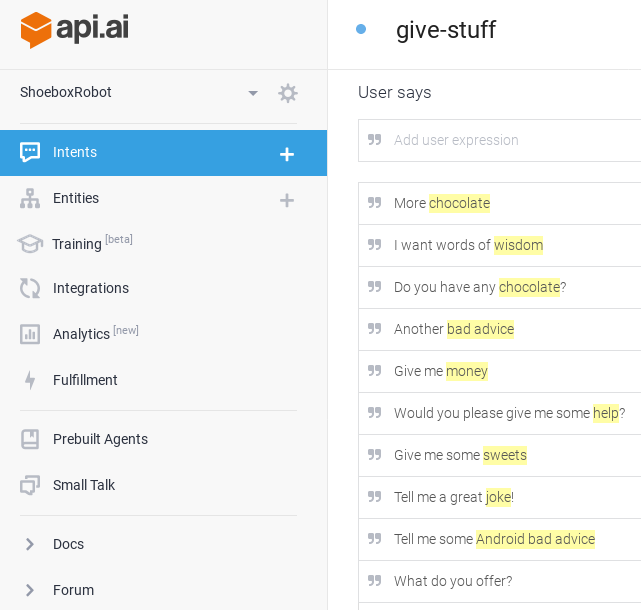
Once again, we specify some sentences a user could pronounce, and API.AI automatically highlights matched entities.
The difference here, compared to the previous body-parts intent, is that we want the user to specify the entity when he pronounces a sentence:
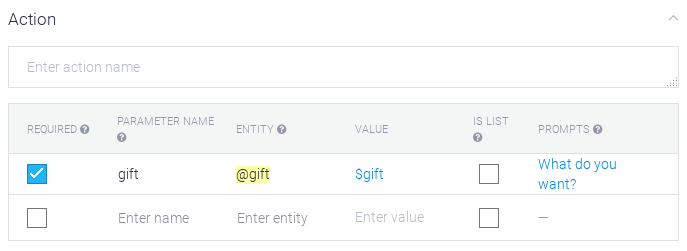
If a user says something like “Give me something”, we don’t want to receive an empty parameter, but instead, the chatbot should prompt the user about what kind of things he wants.
To define mandatory parameters, we can simply select which parameters are required, and create sentences (prompts) the chatbot should reply to the user when a required parameter is missing (“What do you want? Chocolate? Bad advice?).
Step 3: Create an Actions On Google project and configure API.AI’s integration
We have defined intents and entities. Now, API.AI will use those values, coupled with some Machine Learning to provide users a conversational interface. Now, we need to integrate our API.AI chatbot to the Google Assistant, and for that, we will have to create an Actions On Google project that uses API.AI actions (instead of the Actions SDK).
Assistant name: ShoeboxRobot
Pronounciation: Shoebox robot
Then, on API.AI, we enable the one-click “Actions On Google” integration, and that’s all we have to do!
Now, our app will be integrated to the Google Assistant, which means that users only need to pronounce a sentence like:
“Ok Google, let me talk to Shoebox robot”
to start our API.AI conversational app.
Step 4: Create an API.AI webhook
Now, everybody can communicate with our bot, but the integration is still limited: we need to add some business logic.
For example, when someone asks for a Bad Android Advice, API.AI should call our own webservice, so we can randomly select one advice, and send it back to the user via API.AI.
To do that, we add a webhook on API.AI, so that the platform will automatically call our web service with some JSON data:
{
  "id": "UUID",
  "lang": "en",
  "result": {
    "resolvedAQuery": "give me an advice",
    "parameters": {
      "gift": "advice"
    },
    "metadata": {
      "intentName": "give-stuff"
    }
  }
}
To add a webhook, you need to go to the Fulfillment menu, and add your endpoint URL:
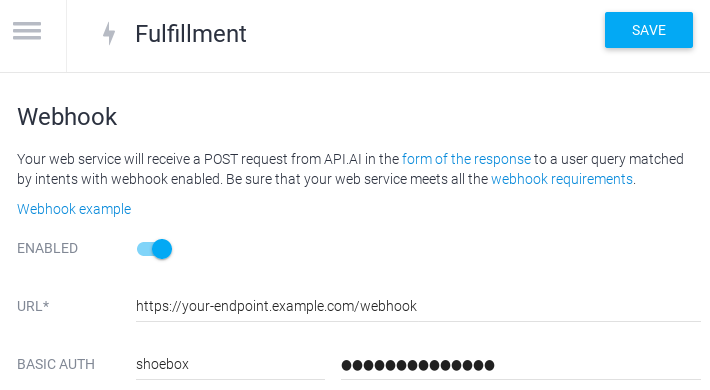
We’ve added a Google Cloud Function. Now, we can get intents, parameters, and perform actions. In that case, we will return a JSON with a randomly chosen Bad Android Advice:
exports.webhook = function(req, res) {
  if (req.body.result.metadata.intentName === 'give-stuff') {
    if (req.body.result.parameters.gift === 'advice') {
      let message = getRandomBadAdvice();
      sendResponse(message, res);
    }
  }
}

function getRandomBadAdvice() {
  let advice = [
    "Use the jack toolchain, it's the future",
    "Don't worry about releasing wakelocks, they are cleared automatically when the battery dies and the phone is restarted.",
    "Write huge methods instead of many small methods to avoid 65k method limit"
  ];
  return advice[Math.random() * (advice.length)];
}

function sendResponse(message, res) {
  let respData = {
    'speech': message,
    'displayText': message,
    'data': {},
    'contextOut': [],
    'source': ''
  };
  res.status(200).json(respData);
}
Pro-tip:
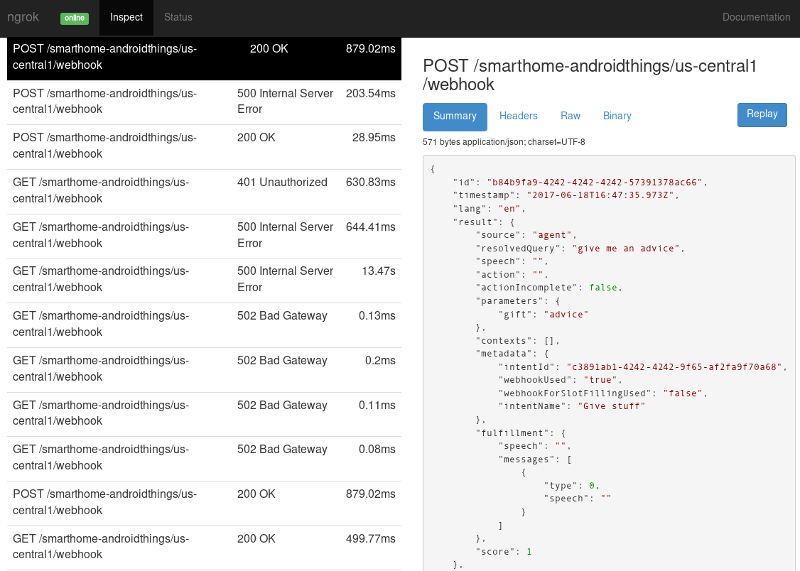
When developing your API.AI webhook, I suggest you to develop it locally, and use ngrok.
Not only ngrok can expose your local server to the Internet, so that changes will be immediately accessible without redeploying, but it also has a web interface that lets you inspect and replay HTTP requests. You will be able to see directly which parameters API.AI is sending to you:
Step 5: Forward events to the Android Things device
When a user asks for a chocolate bar, the API.AI agent calls our web service with some parameters. This latter should tell the Android Things project to give the user a chocolate bar.
To send events from a Google Cloud Function to the Raspberry Pi, the Mocktails Mixer project is using Pub/Sub. We will use it too, to demonstrate that you can use exactly the same stack on Android Things.
Our Google Cloud Function will publish to a PubSub topic when the chocolate value is sent:
if (req.body.result.parameters.gift === 'chocolate') {
    pubsub({ projectId: 'your-google-project-id' })
        .topic('PubSubTopicName')
        .publish('CHOCOLATE')
        .then((results) => {
            sendResponse('Here is your chocolate!', res);
        });
}
And the Android Things device will subscribe to a Pub/Sub topic, and regularly pull data.
PullResponse response = subscriber.pull(PullRequest.newBuilder()
    .setSubscription(SUBSCRIPTION_NAME)
    .setReturnImmediately(true)
    .setMaxMessages(10)
    .build());

for (ReceivedMessage received : response.getReceivedMessagesList()) {
    String message = new String(received.getMessage().getData().toByteArray());
    if ("CHOCOLATE".equals(message)) {
        // TODO: give user a chocolate
        // TODO: update the eyes animation

        // Acknowledge request
        subscriber.acknowledge(AcknowledgeRequest.newBuilder()
            .setSubscription(SUBSCRIPTION_NAME)
            .addAckIds(received.getAckId())
            .build()
        );
    }
}
If you are familiar with Pub/Sub, you may have noticed that we are using Pub/Sub pull instead of push here. This is not a problem, as the device will stay connected to the mains.
Also, we don’t want the device to be visible on the Internet, so let’s forget about Pub/Sub push.
If your device runs on battery and you need pushes, you can consider using Firebase Cloud Messaging instead.
Step 6: Creating the robot (prototype)
The software part is done. Now let’s focus on the hardware and build the robot.
First, we will use a breadboard to connect a simple LED, a button, a servo, and a dot matrix module to the Android Things board.
For the eyes, I used a “Four in One MAX7219 Dot Matrix Module” that costs around $4.
I created several pixel art PNG animations, and wrote a helper method (code) that draws a bitmap over multiple screens of a dot matrix module.

Here’s what the prototype looks like:
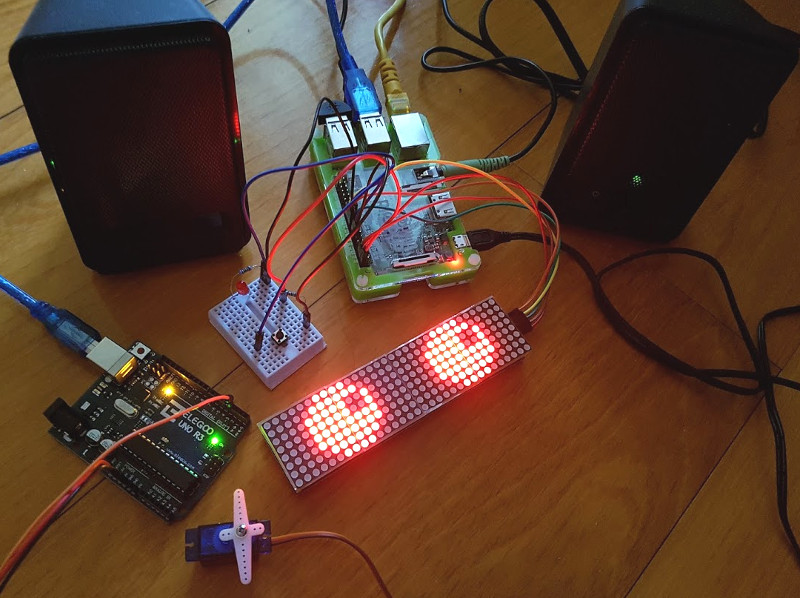
In the picture above, you may have noticed that I am using an Arduino to control the PWM, while we could plug it directly to the Raspberry Pi.
This is actually due to an issue on Android Things Developer Preview 4 for Raspberry Pi (onboard analog audio cannot be used simultaneously with PWM). Once fixed, you won’t need the Arduino anymore.
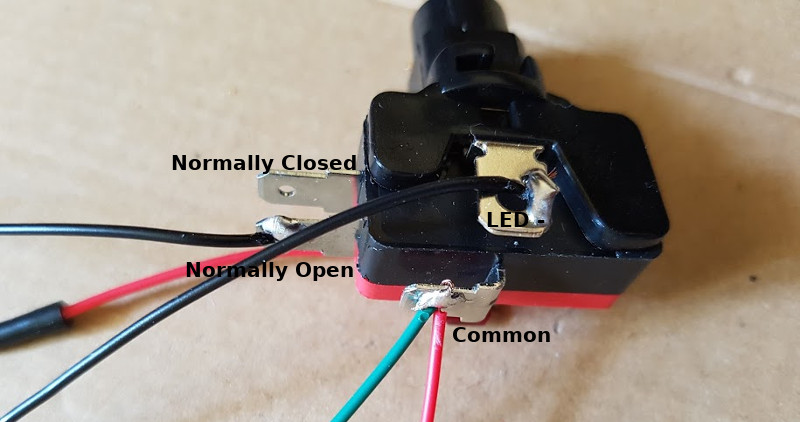
Finally, instead of the separate button and LED, I decided to use an “Arcade Push Button” that combines in the same component an LED and a large button. This will make a great nose.
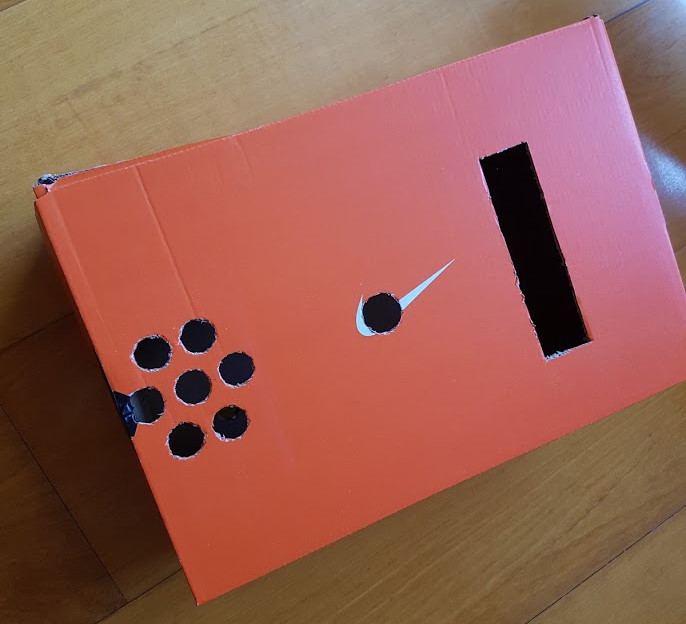
Step 7: Place everything inside the box
Cardboard is great for prototyping. We’ll use here a shoebox, make some holes in it.
We glued a slope inside the box. The servo will prevent the chocolate bar from falling.
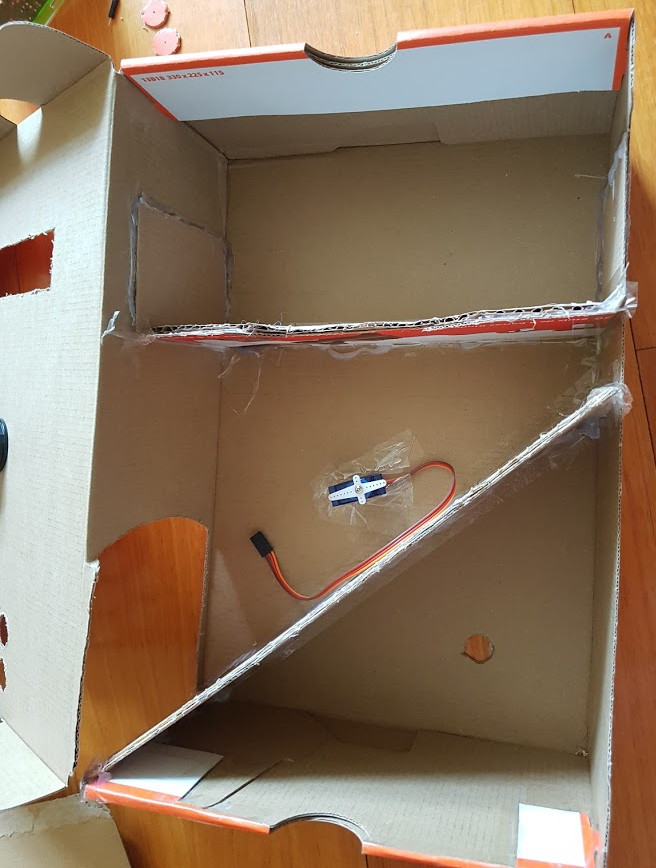
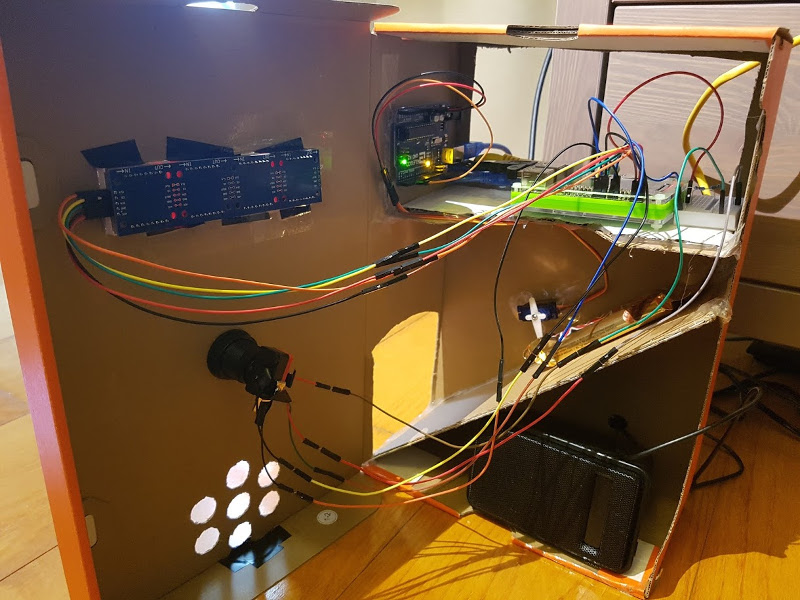
Finally, we place the Android Things board and cables inside. Here’s what it looks like on the inside:
We can now close the box, and say “Hello” to our new friend.
Want to build your personal assistant now?
I hope this blog post made you want to try creating your own chatbots or robots, powered by the Google Assistant.
To go further, I suggest you to take a look at those videos:
Then, read the Mocktails Mixer source code for a better understanding of how to use the power of the Google Assistant in your own IoT projects.
Lastly, the source code of the shoebox robot is available on github.com/Nilhcem/assistant-androidthings.